
Guides for building owners
How to configure a project
After you copy the master, slim the catalogue to this building's goals, use cases, and model split
Published
Simon Dilhas (Cofounder abstract & BIM Pirate)
Start Free NowAfter you copy the master, the catalogue is still too large. Configuration means: which goals apply, at which intensity, and which use cases this project actually runs. You can start from goals or tick use cases directly - most teams do both.
Always work on a draft. If you see the live-data banner, click Create a draft to start editing.
Option A - High-level project goals
Use this when the client cares about outcomes (fit-out, sustainability, operations) rather than a list of BIM use cases.
- Open the Goals tab.
- For each goal, pick a sensitivity level (Ausprägung).
- Click Save in the toolbar.
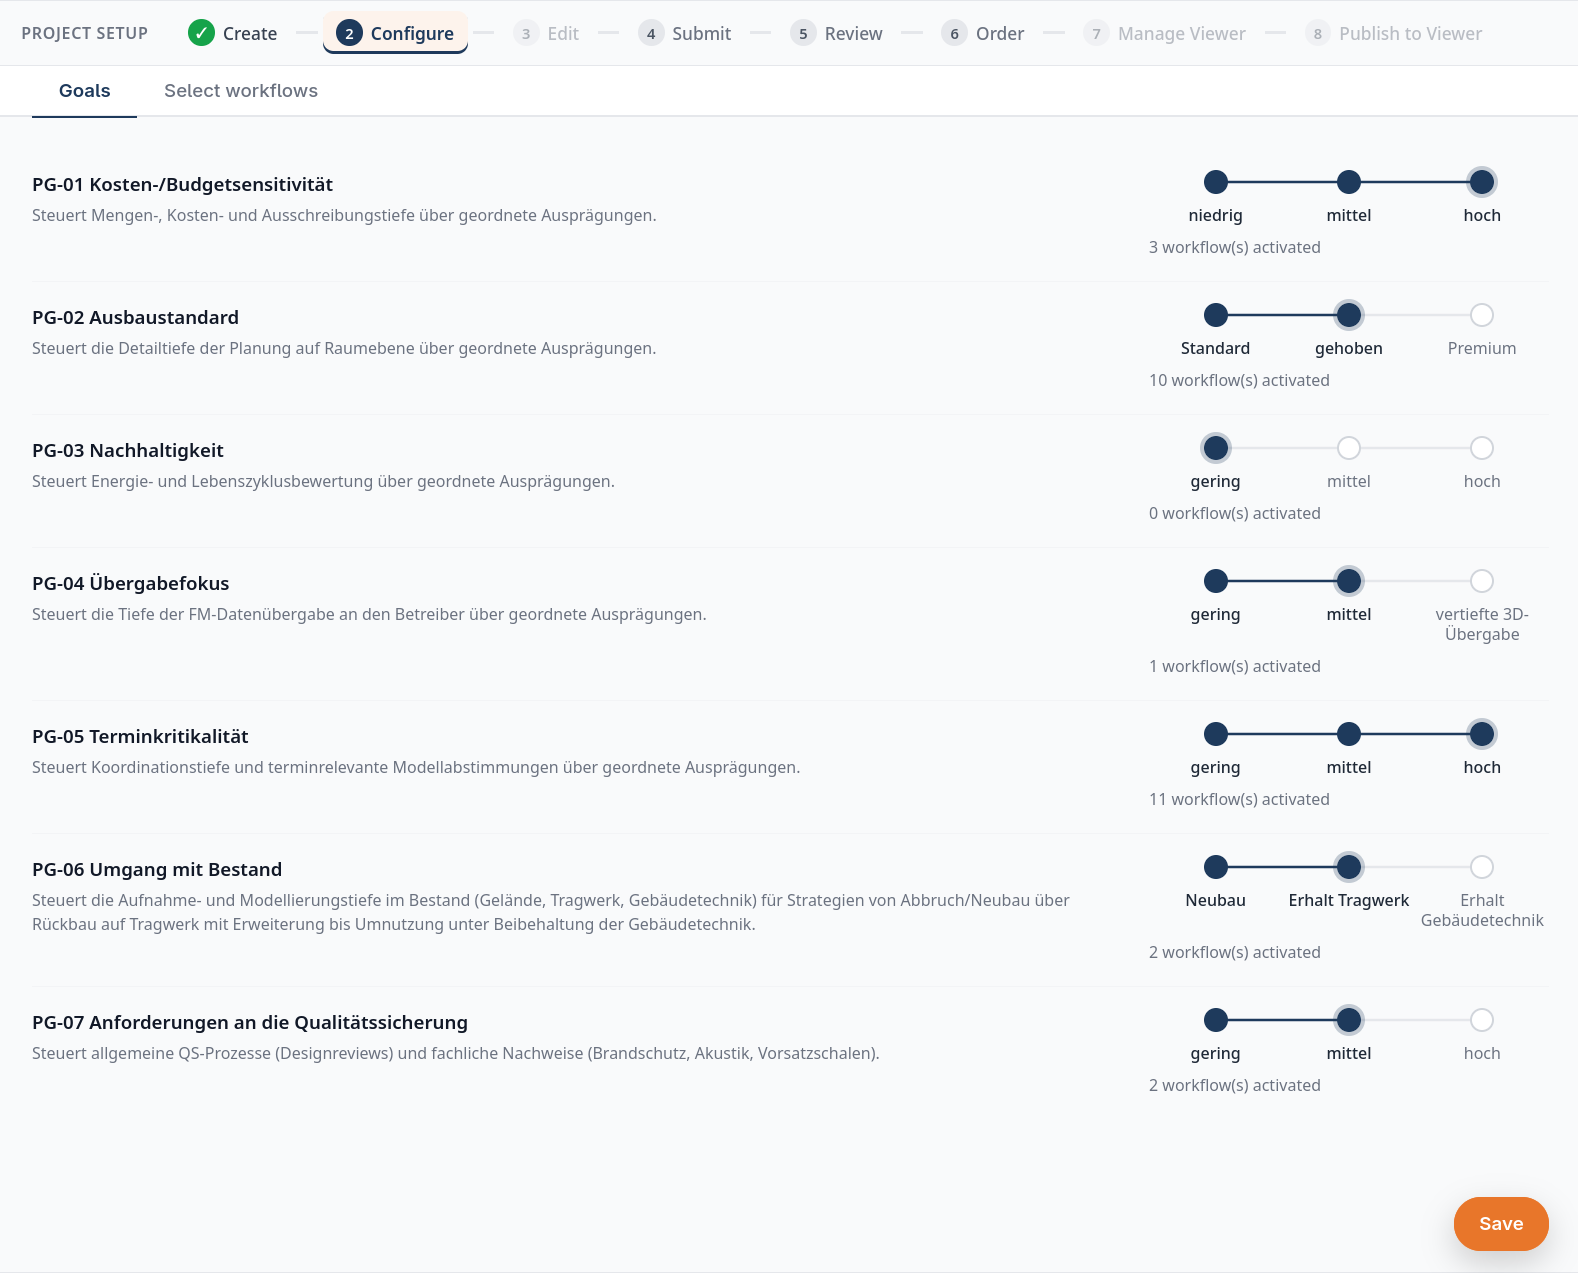
Saving stores the selection and can activate the matching workflows from the master (the union of all levels up to the one you picked).
Option B - Select use cases
Use this when the BIM execution plan already names use cases, or to fine-tune what goals switched on.
- Open Select workflows.
- Review the list. Use Select ▾ for select all / none if needed.
- Tick or untick use cases, then Save.
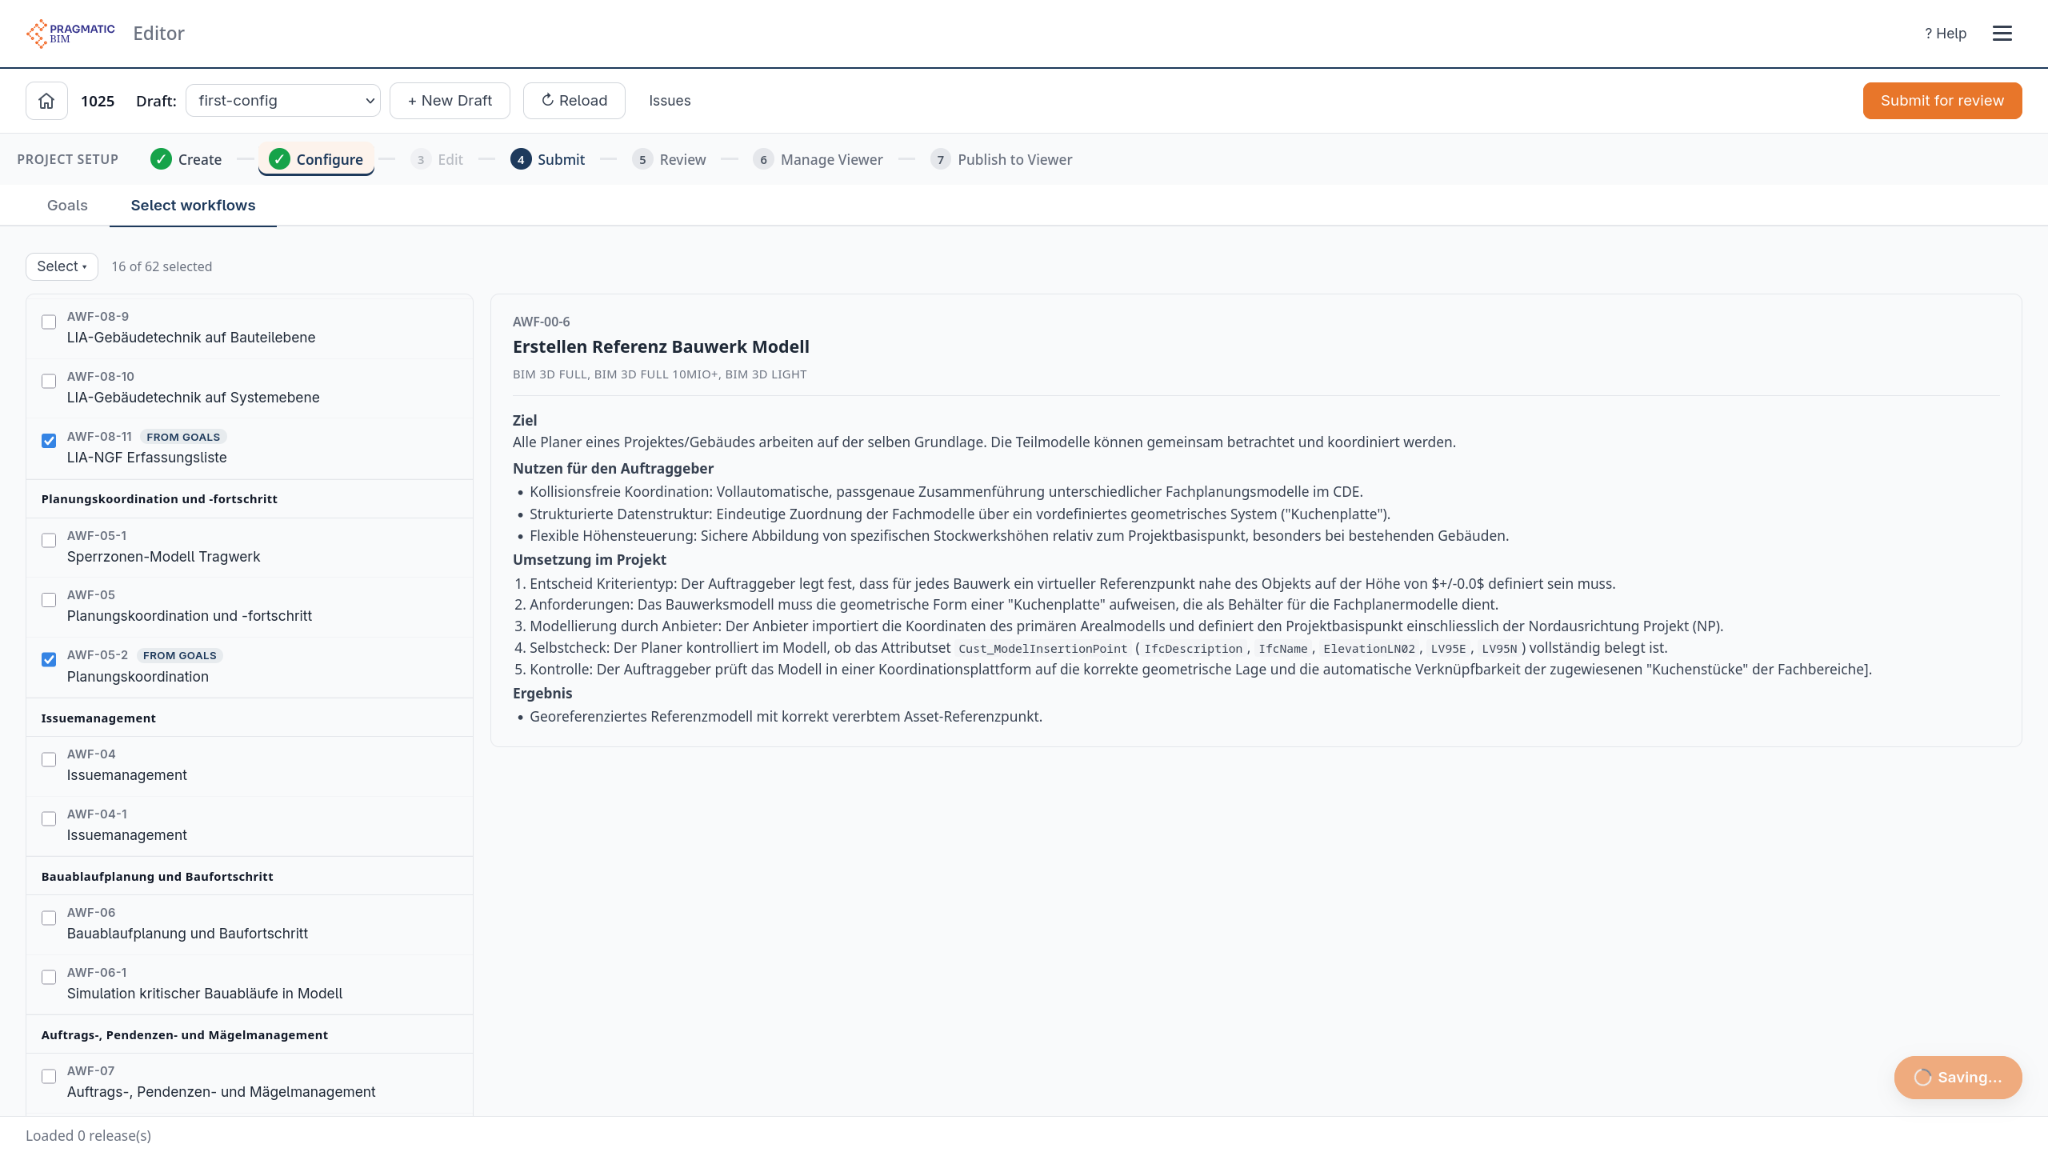
You must keep at least one workflow.
Then assign where information lives
Open Information Delivery Plan and say in which model each required element belongs. See Create an Information Delivery Plan.
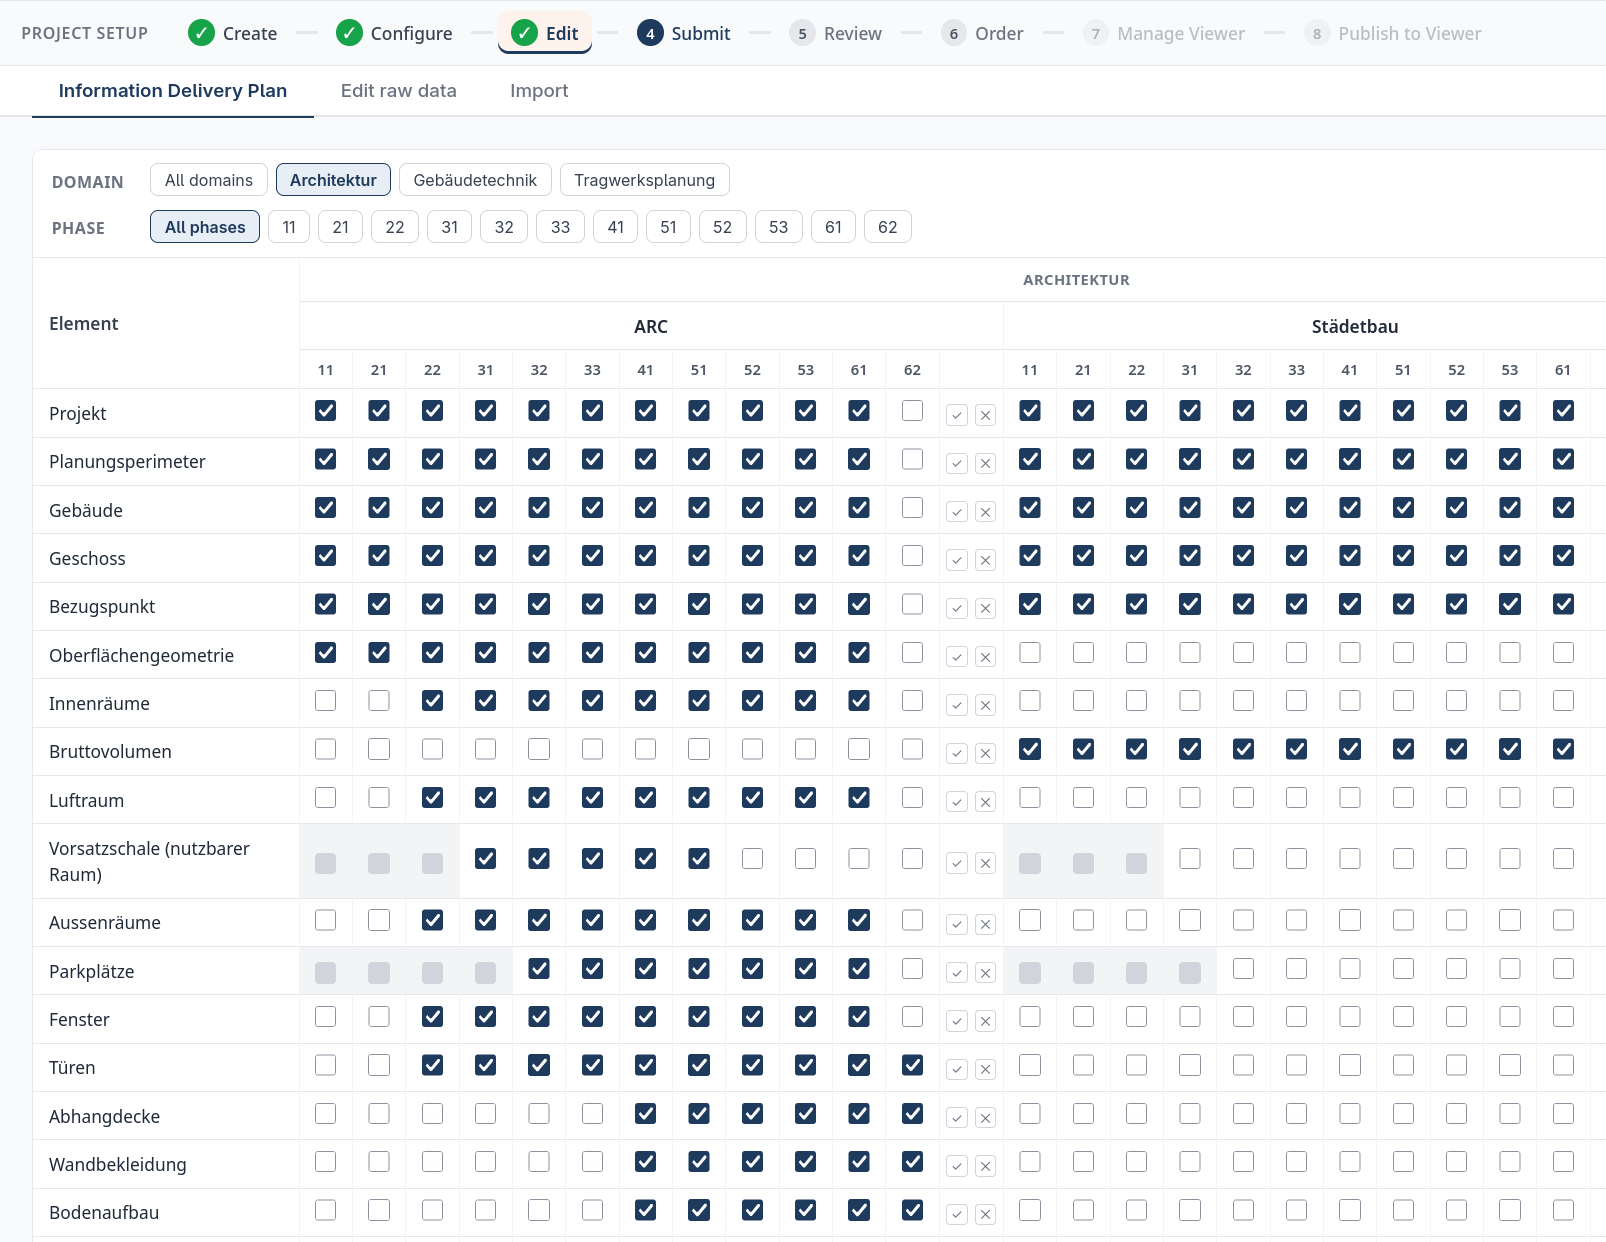
Optional: Project details (name, number, language) and Edit raw data if you must change individual elements or attributes for this project only.
Make it official
Goals and use cases slim this repository. They go live only as a project release: same freeze as the template, different purpose. The template release seeds new projects. The project release is what the viewer shows.
Configuration lives on the draft until you:
- Submit for review
- Admin: Pending Reviews → Approve & Apply
- Publish Version so the viewer and IDS checks use it